Framing A House
Framing a house is a complex and crucial step in the construction process. While it's possible for a novice to tackle this project, it's important to prioritize safety and ensure that you follow local building codes and regulations. Here are detailed instructions to guide you through framing a 3-bedroom house:
Materials Needed:
Lumber (2x4s, 2x6s, etc.)
Nails or screws
Hammer or nail gun
Circular saw or framing nailer
Level
Measuring tape
Carpenter's square
Safety goggles and work gloves
Ear protection (if using power tools)
Ladder or scaffolding (if needed)
Anchor bolts and sill plates (for securing the frame to the foundation)
Concrete anchor straps (for seismic areas)
Instructions:
1. Obtain the Necessary Permits:
Before starting any construction project, obtain the required permits and approvals from your local building department.
2. Set Up the Site:
Clear the construction site of any debris, rocks, or vegetation. Mark out the corners and layout of the house using stakes and string lines.
3. Lay the Foundation:
If the foundation is not already in place, hire a professional to pour the foundation according to the architectural plans.
4. Install Sill Plates:
Attach the sill plates (pressure-treated lumber) to the foundation using anchor bolts. This provides a secure base for the walls.
5. Lay Out the Wall Plates:
Measure and mark the positions of walls on the sill plates. Ensure that measurements are accurate and that walls are square.
6. Construct Wall Frames:
Build individual wall frames on a flat surface. Use 2x4 or 2x6 lumber for the top and bottom plates, and vertical studs spaced 16 inches apart.
7. Raise the Wall Frames:
With the help of others, lift the wall frames into position on the sill plates and secure them using nails or screws. Use a level to ensure they're plumb (vertical) and level (horizontal).
8. Frame Door and Window Openings:
Measure and mark the positions for door and window openings. Frame these spaces using header boards and vertical studs.
9. Install Structural Elements:
Add beams, headers, and other structural elements according to the architectural plans. These provide additional support to the frame.
10. Frame Interior Walls:
Repeat the process to frame the interior walls, ensuring they align with the layout specified in the plans.
11. Add Support for Stairs:
If your house has multiple levels, frame the area where the stairs will be installed.
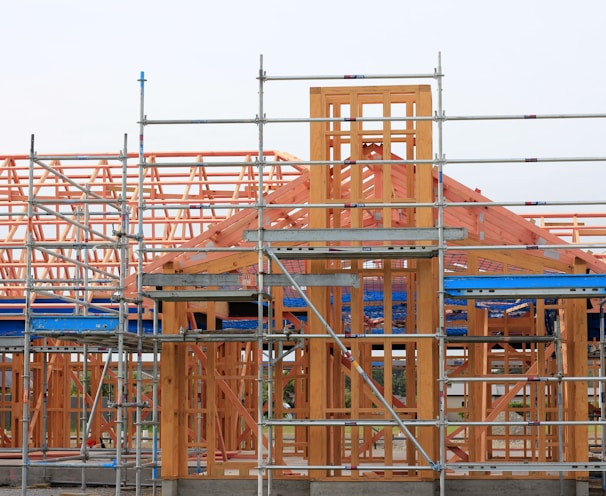
12. Install Roof Trusses or Rafters:
If using trusses, lift and secure them onto the top plates of the walls. If using rafters, cut and install them individually, following the roof pitch specified in the plans.
13. Brace the Structure:
Temporarily install diagonal bracing to provide stability to the frame. This will help keep the structure secure during construction.
14. Secure the Frame to the Foundation:
Use anchor straps or other recommended methods to secure the frame to the foundation, especially in areas prone to earthquakes.
Remember to follow all safety precautions, wear appropriate protective gear, and work methodically. If you're unsure about any step, consider consulting a professional or seeking advice from your local building department.